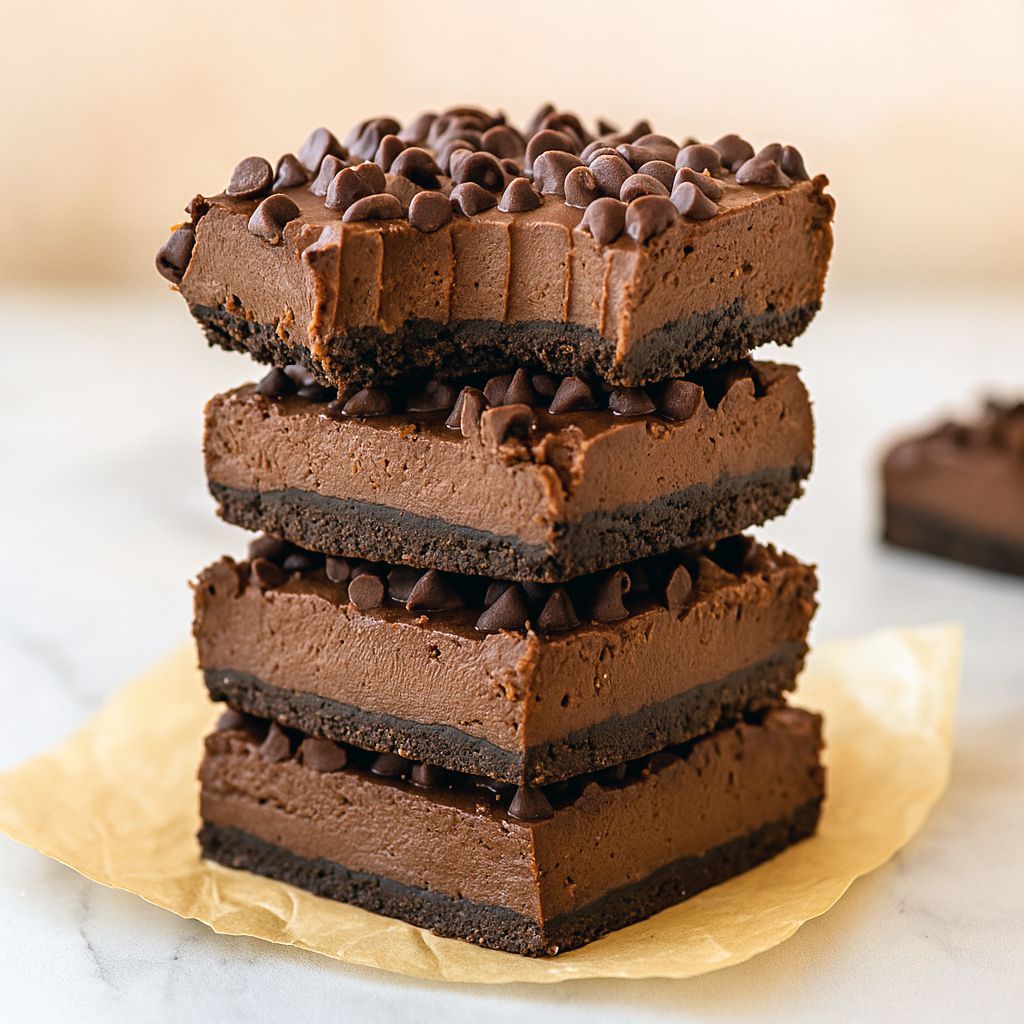
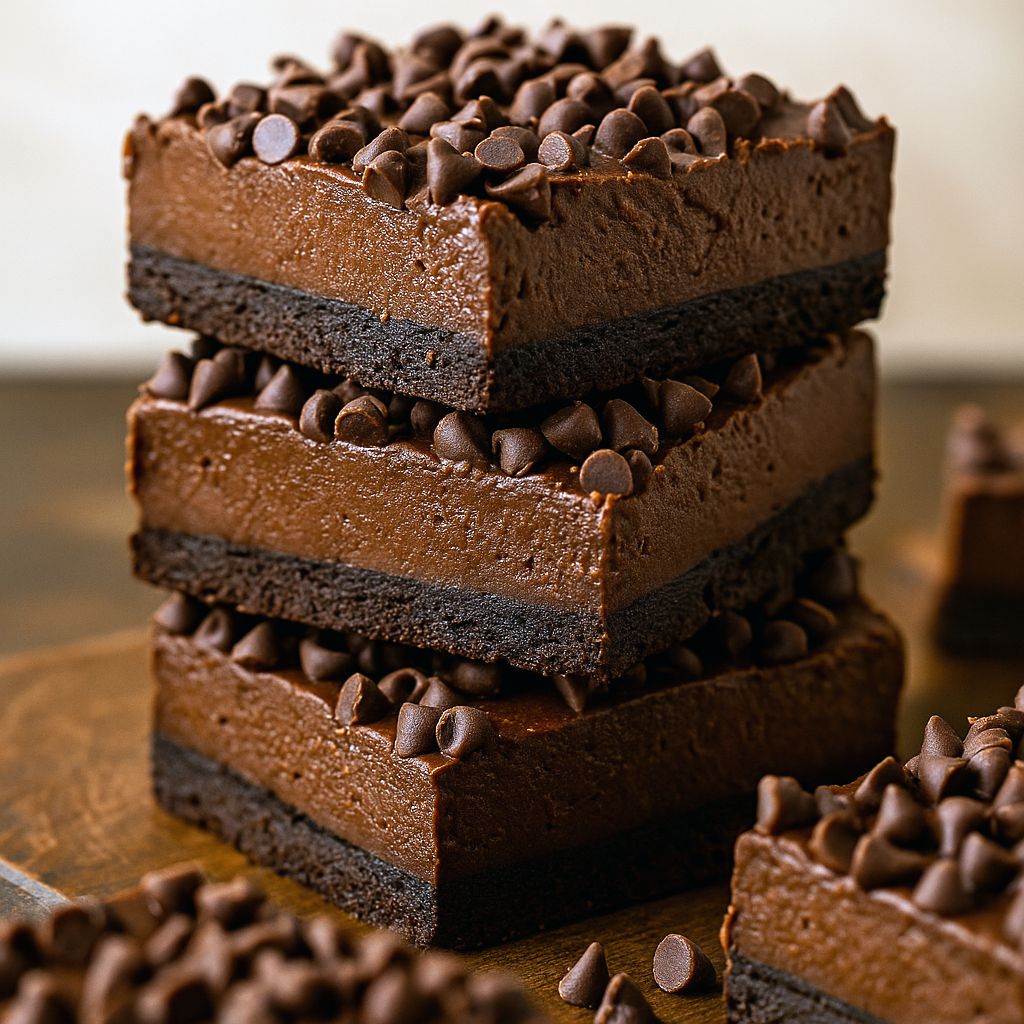
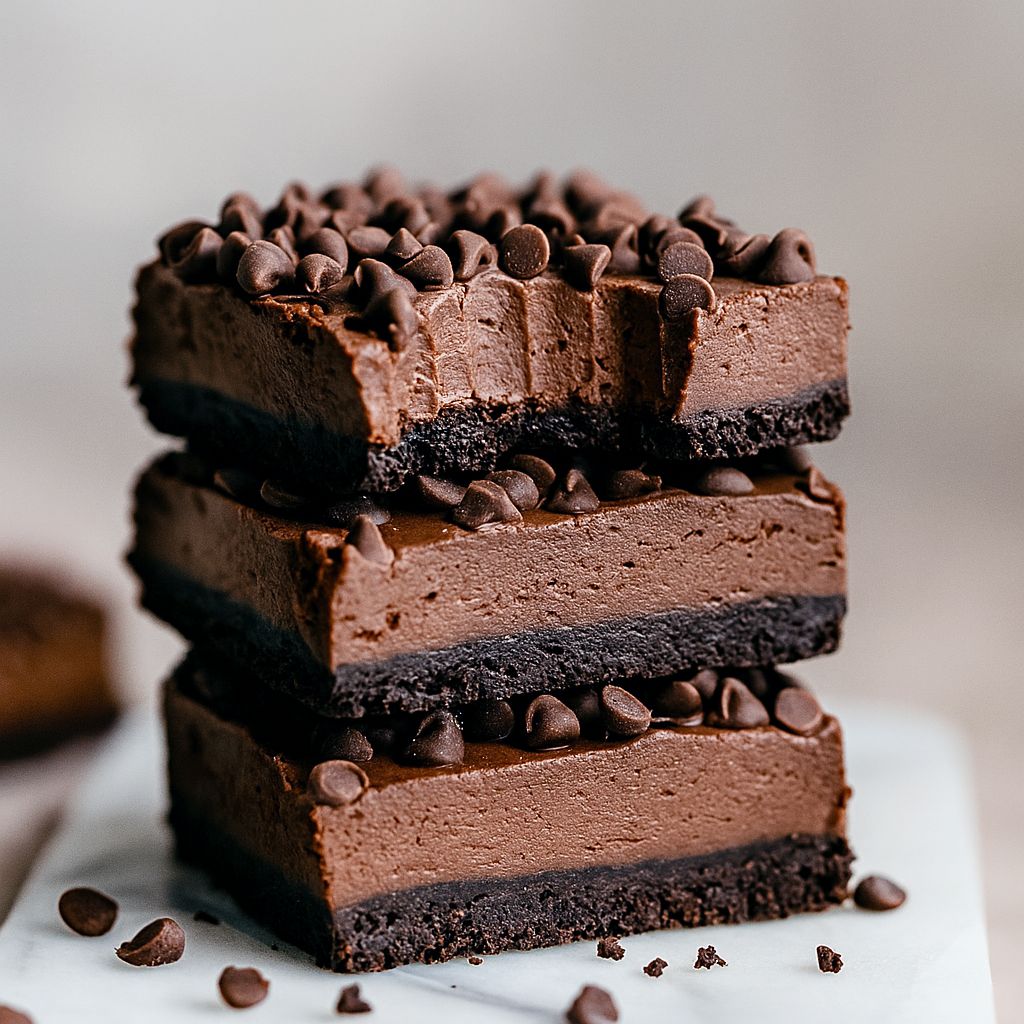
If you love chocolate and want something show-stopping with zero oven drama, these Chocolate No-Bake Cheesecake bars are your new best friend. Think ultra-creamy, intensely chocolatey filling perched on a thin crunchy cookie crust — a dessert that whispers “fancy” but actually takes very little effort. Want to impress at a dinner party or bring a summer-friendly sweet? This is it.
What makes this recipe so irresistible?
Why do people lose their minds over these squares? First: the texture contrast — a crisp, chocolate cookie base vs. silky, mousse-like cheesecake. Second: concentrated chocolate flavor from real bars of dark chocolate (NOT chips). Third: they’re make-ahead friendly, so you look calm and collected when everyone is raving. And honestly — who doesn’t love a dessert that feels decadent but practically makes itself?
Ingredient snapshot (quick & honest)
You don’t need an intimidating shopping list. For the crust and filling you’ll need:
- Oreos (or chocolate sandwich cookies)
- Unsalted butter, melted
- Dark chocolate bars (use real chocolate bars; they melt beautifully)
- Full-fat cream cheese (brick style — do not use tub spreadable cream cheese)
- Heavy whipping cream
- Optional splash: Baileys Irish Cream or Kahlúa (for grown-up depth)
- A pinch of salt
- Mini chocolate chips for surface sparkle
This combo turns into a classic No Bake Chocolate Cheesecake that sings chocolate notes without turning on the oven.
How to make it — fast and fail-safe
- Blitz the Oreos in a food processor until they’re crumbs. Mix in melted butter and some melted dark chocolate, then press into a lined 9×9 pan to form the crust.
- Melt your chocolate bars (not chips) gently — a double boiler or low-power microwave in short bursts works great.
- Beat full-fat cream cheese until smooth, then add the melted chocolate, heavy cream, and an optional tablespoon of Baileys or Kahlúa. Whip until silky and slightly thickened. Use a spatula to fold, not rage-whip — we want creamy, not airy.
- Pour the filling over the crust, sprinkle mini chips on top, and refrigerate for at least 3 hours (overnight is better) until firm.
- Slice into small squares — a little goes a long way. Enjoy.
Bold tip: Use chocolate bars, not chips, for the filling — chips contain stabilizers that resist melting and can ruin the texture.
The story behind the bars
I wanted a dessert for chocoholics that didn’t require babysitting an oven or complicated tempering. These bars combine the nostalgia of Oreos with the luxurious mouthfeel of a classic cheesecake — but without baking. They became my go-to for holidays and late-night cravings, especially when I wanted something that felt decadent but was shockingly easy to assemble. Make-ahead? Check. Crowd-pleaser? Double check.
Pro tips for the best outcome
- Full-fat cream cheese is non-negotiable. It gives richness and structure.
- Chill for at least 3 hours; the filling needs time to firm up.
- Don’t use spreadable cream cheese from a tub — it’s too soft and watery.
- Avoid milk or half-and-half as a substitute for heavy cream — heavy cream provides the necessary fat to set the bars.
- Use mini chocolate chips on top — they look elegant and distribute flavor evenly.
- If your melted chocolate seizes, add a spoonful of warm cream and whisk; it should smooth out.
(IMO, the Baileys is a small luxury move that makes these taste restaurant-level. FYI: it’s optional but delicious.)
Variations to try
- Salted caramel swirl: drizzle salted caramel over the filling before chilling.
- Peanut butter ripple: fold in a few tablespoons of peanut butter for a PB-choco twist.
- Mint chip: add a drop of peppermint extract and sprinkle chopped Andes mints on top.
- Double chocolate crunch: fold in crushed chocolate-covered toffee for extra texture.
These ideas keep the base recipe intact while taking it into playful territory — perfect for Fun Baking Recipes and testing at bake sales.
Best way to serve
Cut these into small squares — they’re rich, so smaller portions feel right. Serve chilled with a dollop of whipped cream or a spoonful of vanilla ice cream if you want contrast. For a dinner party, plate one square with a dusting of cocoa and a fresh raspberry for color. These also make spectacular Dessert Bars for holiday platters.
Storage & make-ahead magic
This recipe shines as a make-ahead dessert. Cover the pan tightly with plastic wrap and refrigerate — they’ll keep for up to a week (though they rarely last that long). You can also freeze individual squares wrapped in parchment and then foil; thaw in the fridge before serving. These bars qualify as solid Delicious Snacks Recipes for prepping in advance.
Quick storage tip: Once set, cover the pan to prevent fridge smells from invading your chocolate heaven.
FAQs (short + real)
Q: Can I use chocolate chips instead of a chocolate bar?
A: Don’t. Chips contain stabilizers and won’t melt as smoothly. Use a quality chocolate bar for best texture and flavor.
Q: Do these need to be refrigerated?
A: Yes — because the filling relies on dairy fat to set, keep them chilled. They store well in the fridge.
Q: Can I double the recipe?
A: Absolutely. Double the ingredients and use a 9×13 pan.
Q: How long do they need to chill?
A: Give them at least 3 hours, but overnight is ideal for clean slices.
Final thoughts
If you want an Easy Chocolate Desserts option that reads like a showstopper but requires minimal hands-on time, this Dessert Bar Recipe ticks every box. It marries creamy cheesecake richness with intense dark chocolate and a crunchy cookie base, producing Cheesecake Bars that satisfy hardcore chocoholics and casual dessert fans alike. Whether you need Sweet Snacks Recipes for a potluck or a decadent end to a dinner, these no-bake beauties deliver. Go on — make a pan and prepare to be chased for the recipe.

Death-By-Chocolate No-Bake Cheesecake Bars (Easy Recipe)
- Prep Time: 10 minutes
- Additional Time: 3 hours
- Total Time: 3 hours 10 minutes
- Yield: 16 servings
- Category: Dessert
Description
Only for hardcore chocolate fans — these bars are insanely rich, velvety, and loaded with chocolate. No oven needed and perfect to make ahead.
Ingredients
Crust & Base
- 18 Oreo cookies
- ¼ cup unsalted butter, melted
- 1 tablespoon dark chocolate, melted
Filling
- 4 ounces cream cheese (brick-style), softened
- 8 ounces dark chocolate, finely chopped
- ¾ cup heavy whipping cream
- 1 tablespoon Baileys Irish Cream or Kahlúa (optional)
- ½ teaspoon salt (optional but recommended)
- ½ cup mini semi-sweet chocolate chips, for sprinkling
Instructions
- Line a 9×9-inch baking pan with foil (or parchment) and spray lightly with cooking spray. Set it nearby.
- Place whole Oreos in a food processor and pulse until they become fine crumbs.
- In a small microwave-safe bowl, combine the melted butter and 1 tablespoon dark chocolate. Heat in short bursts, stirring between each, until everything is smooth.
- Pour the chocolate-butter mix into the cookie crumbs and pulse a few times to mix. Press that mixture firmly and evenly into the prepared pan to form the crust. Tight packing helps the bars slice cleanly.
- In a large bowl, beat the softened cream cheese with a handheld mixer until fluffy and smooth.
- In another microwave-safe bowl, add the chopped 8 oz dark chocolate and the heavy cream. Heat in 30-second bursts, stirring after each, until the chocolate melts into a glossy, silky ganache (about 90 seconds total, depending on your microwave). Heat gently to avoid scorching.
- Pour the warm chocolate-cream mixture into the bowl with the whipped cream cheese and beat on high until the filling turns uniform and silky.
- Stir in the optional liquor and the salt if using. I strongly recommend adding salt — it brightens the chocolate and balances the richness.
- Spread the chocolate filling evenly over the cookie crust. Sprinkle the mini chocolate chips over the top.
- Refrigerate uncovered for at least 3 hours (overnight is even better) until the filling firms. Once fully chilled, cover the pan tightly with foil or plastic wrap to keep flavors fresh and prevent fridge odors.
Notes
Notes & Storage
- Do not cover while the bars are still warm. Covering too early traps condensation. Wait until they’ve chilled through, then seal.
- These bars keep very well in the fridge — store covered and enjoy for at least 10 days (use your judgment beyond that).
- Want to double the batch? Use a 9×13 pan and increase quantities proportionally.
Pro tip: Use real chocolate bars (not chips) for melting — they create a smoother, richer filling. FYI: a little booze (Baileys or Kahlúa) takes these from “wow” to “whoa.”
Nutrition
- Serving Size: 1
- Calories: 267kcal
- Sugar: 17g
- Sodium: 147mg
- Fat: 18g
- Saturated Fat: 10g
- Carbohydrates: 24g
- Fiber: 2g
- Protein: 2g
- Cholesterol: 29mg


